
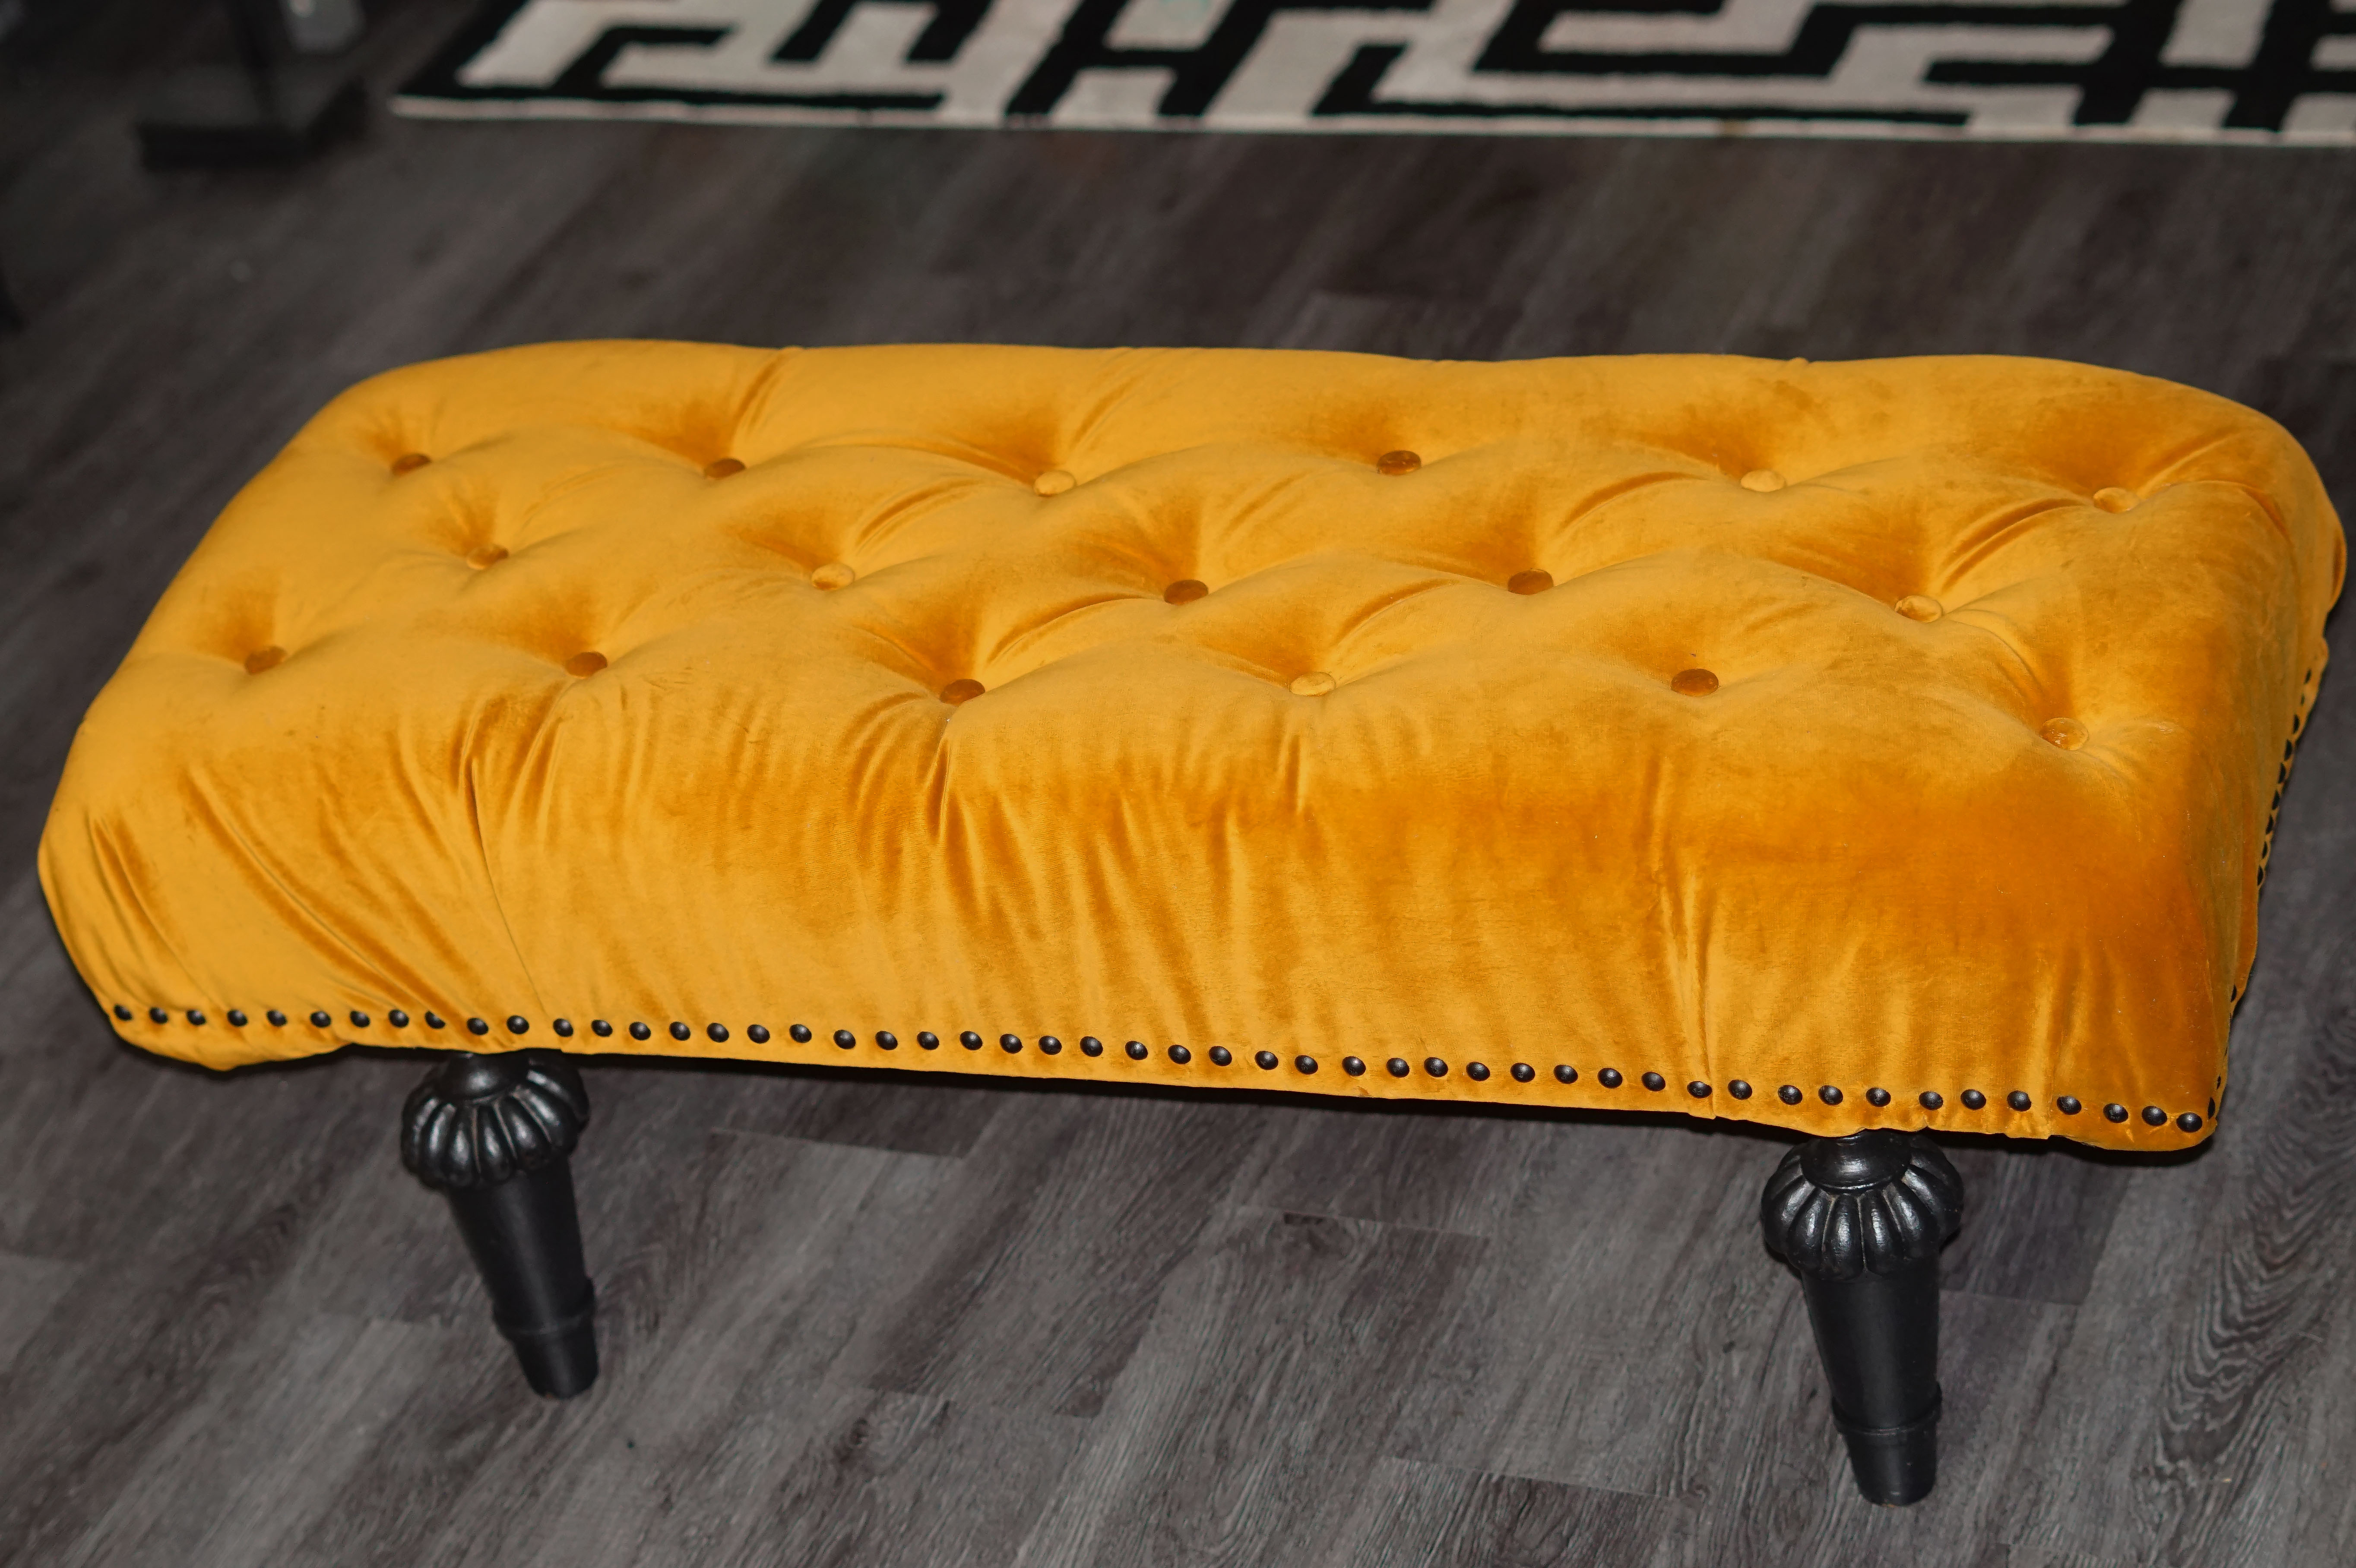
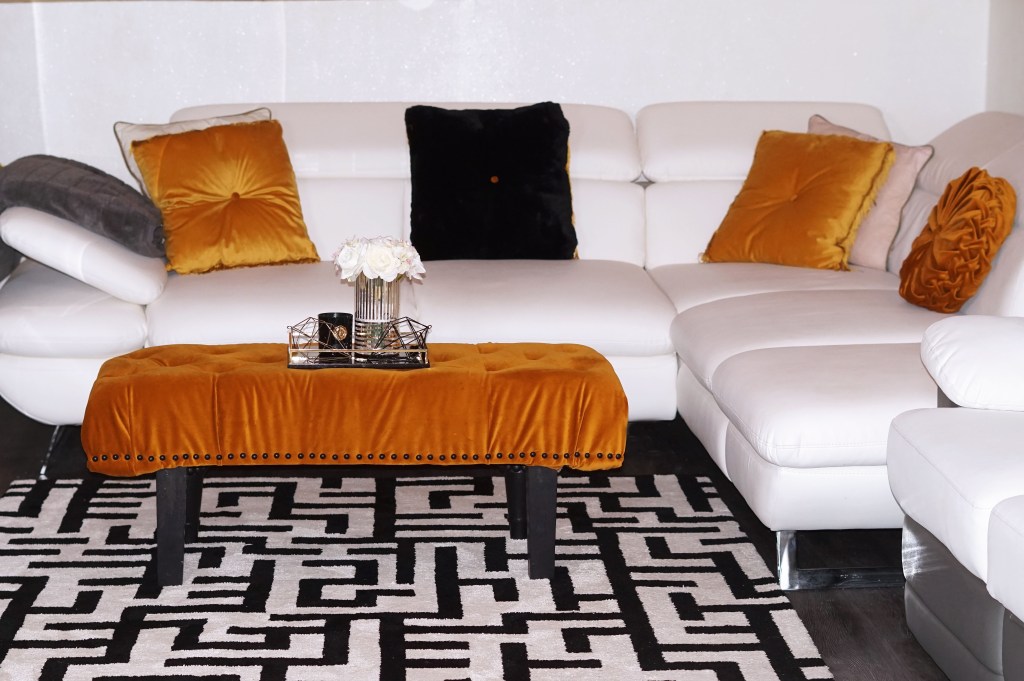
It feels good to proudly pronounce that I am a Carpenter 😆, even when I never realised I could make a bench talk-less of a making tufted footstool bench. I really do feel overwhelmed, this project has been on my mind for months and it totally invaded my whole thoughts and now that is done I really do feel accomplished.
Who doesn’t love a piece of elegant upholstery furniture? As a home decor expert, I consider Tufting as a rare home furnishing creation and whoever first invented it is a genius pioneer. I’ve always been attracted to upholstery but the only disadvantage was that they are always pricy for my reach and it is understandably expensive because they come with lovely finishings and luxurious upholstery fabrics most especially the velvet tufted ones, and producing one involves a lot of refining and dedicated working hours which resultantly affect the price.
Upholstery tufting furniture can range from a Queen headboard, coffee table, armchair, ottoman, dining chair, chaise lounge, chesterfield sofa to simply a bench, and regardless of its pattern the price is always associated to its material and quality.
I really do love getting busy and productive especially with my spare time, before making this bench in the beginning I thought it was going to involve sewing and I’m not really good at sewing which I’d gladly love to learn but fortunately after making my findings I realised that it wasn’t necessary that there are other easy ways to make a DIY Tufted bench, DIY headboard, storage bench or upholstery of any kind.
So in this tutorial I’m going to teach you a handcraft that involves no sewing and is known as the no-sewing tufting technique. You might want to hang on a while with me because you’re going to be learning a lot about how to make a solid buttoned velvet footstool tufted bench that will last you for a long time.
This technique I’m about to show you can be used in making any kind of upholstered furniture, so what are you going to need?
TOOLS
- Electric Drilling Machine
- Drill woodscrew – between 2/16 used to makes holes
- Electric Screwdriver
- Hammer
- Stapler Gun
- Nails
- 5mm Woodscrew
- 3mm wide Washer
- 60 mm Leg assembly
- Nose Plyer
- Crosscut Saw
- Measurement Tape
MATERIALS
WOODS
- Bench Feet- I used an old bench feet I had
- Board
- Plywoods – to add more dimension to the bench
FABRICS
- Upholstery Velvet fabric
- Batting fabric
- Underlying fabric

OTHERS
- Black Paint
- Mattress Foam
- Craft Cover Button Kit
- Upholstery Thread
- Black Pushpins
- Fabric glue
- Sandpaper
- Multi-use Adhesive
- Upholstery Needle


OK LET’S GET TO WORK!
INSTRUCTIONS
STEP 1: START OFF WITH THE BENCH FEET
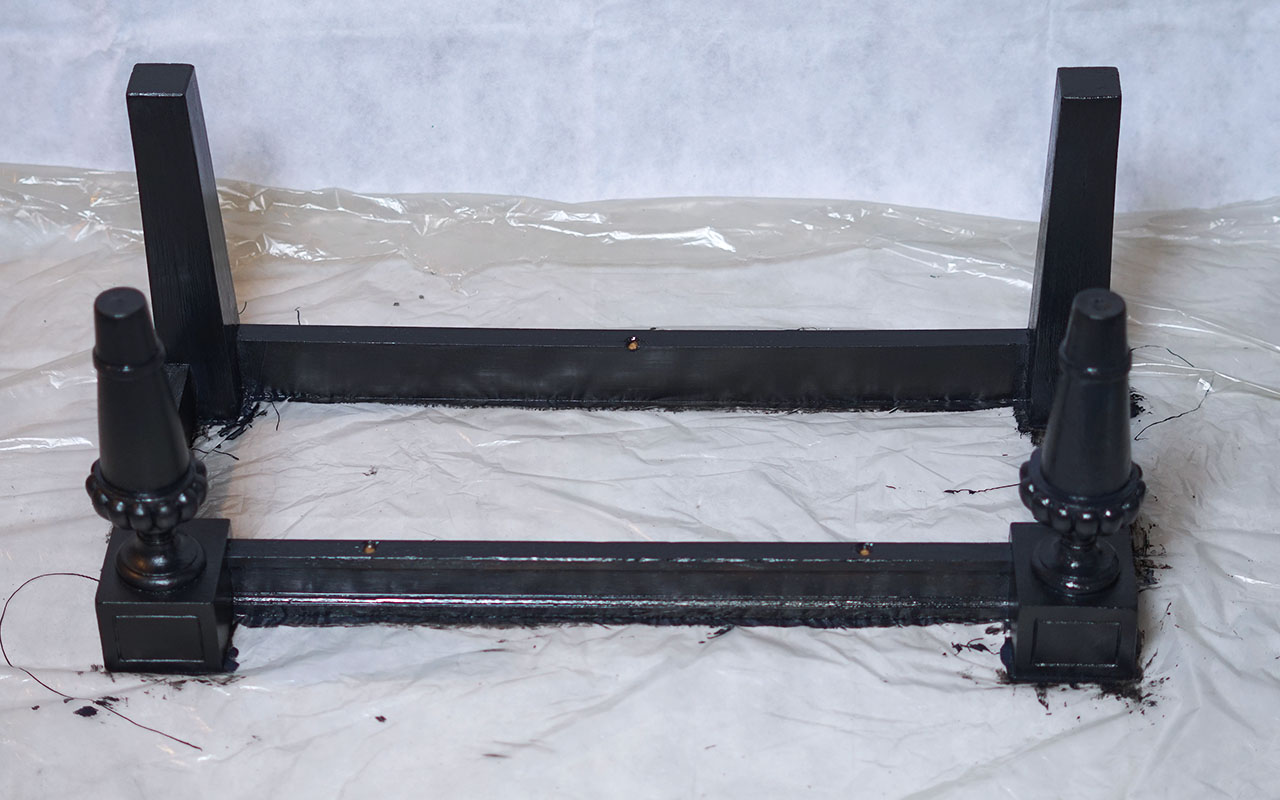
Sandpaper the bench feet. For this project, I’m using an old bench feet so in this case, I don’t have to build any feet all I have to do is to add some more plywood to the perimeter of the bench to give it some dimension and shape for the foam to lay balanced.
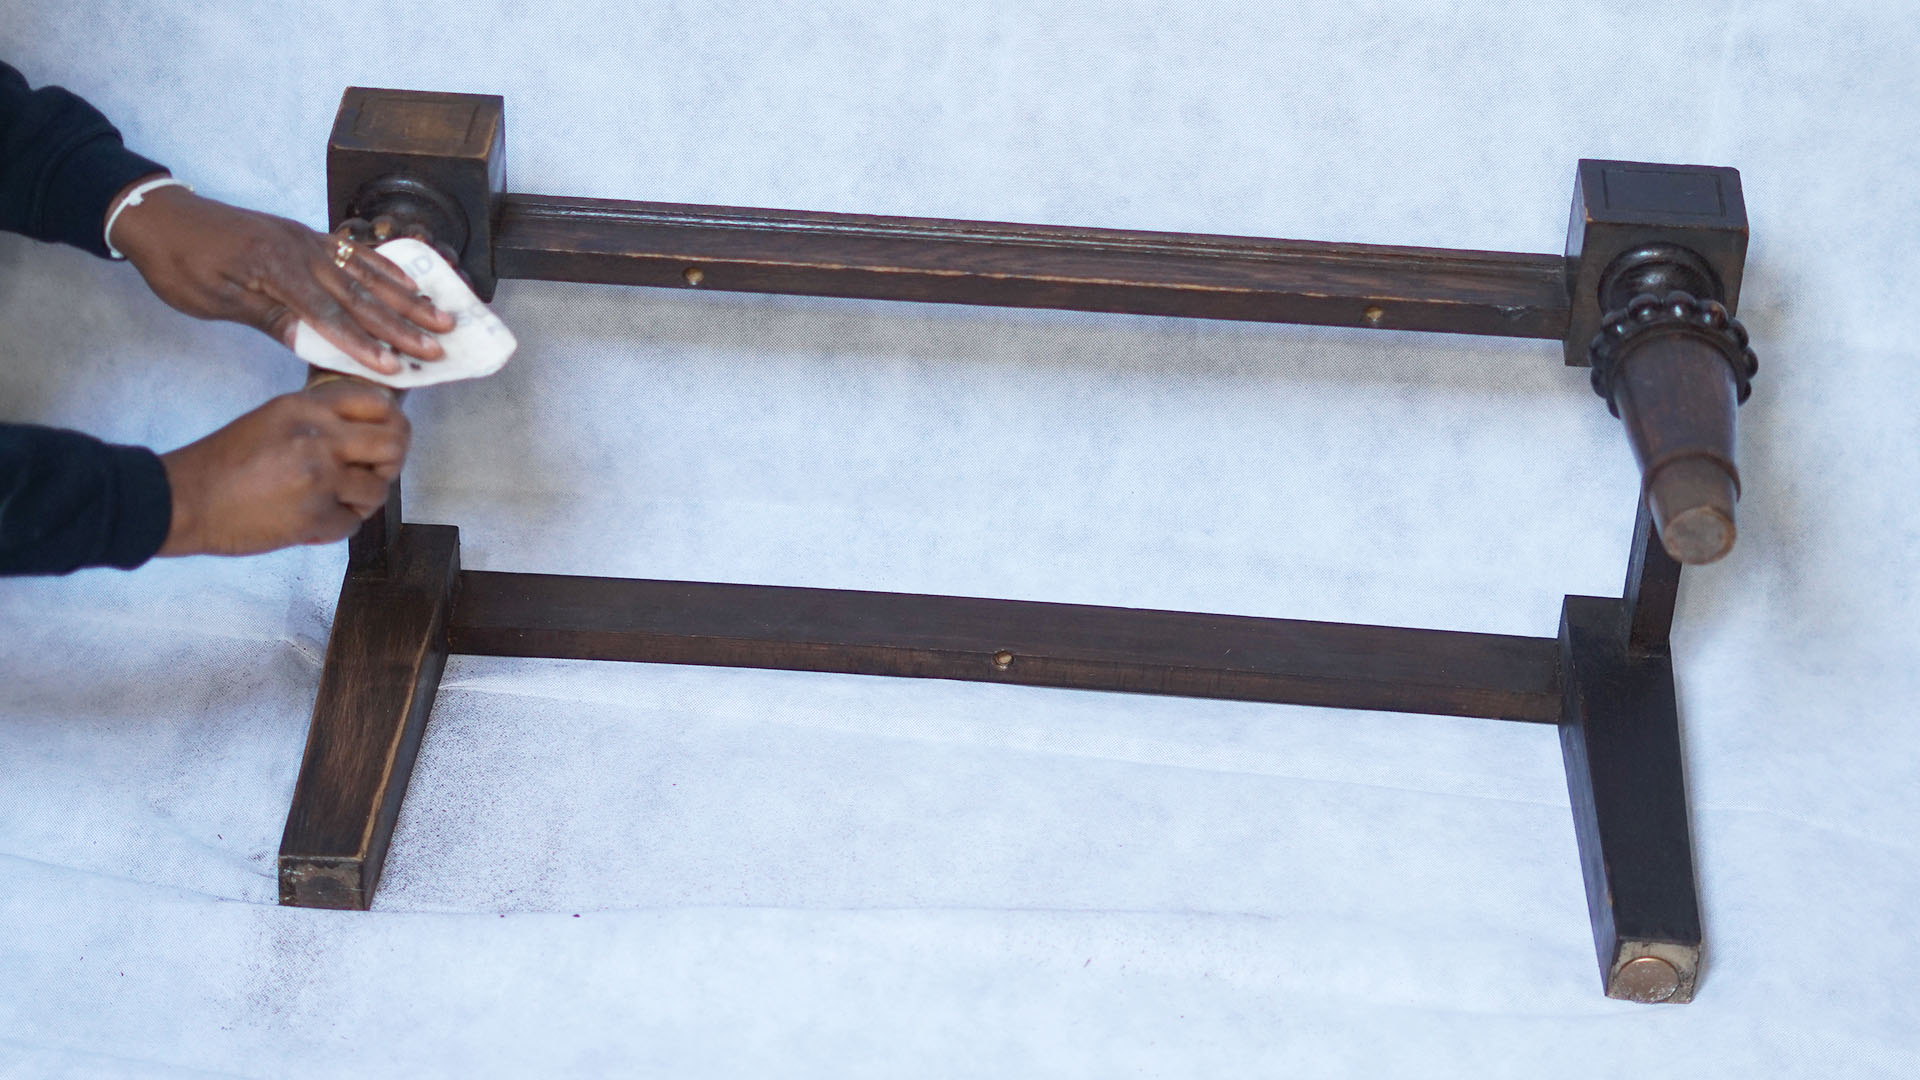

You’ll also need to paint the feet of the bench to black as it is better to do so before adding the velvet fabric to avoid stains.
STEP 2: CUT OUT A PLYWOOD BOARD BASE
Cut a piece of plywood to fit the size of the bench feet. Now you’re going to turn the bench facing upward and place it on top of the inner part of plywood board, trace out the perimeter of the bench and paint it as well, this will really help you know where the feet stands under the board and also where to add the extra plywood around the perimeter of the bench as mentioned in step one.
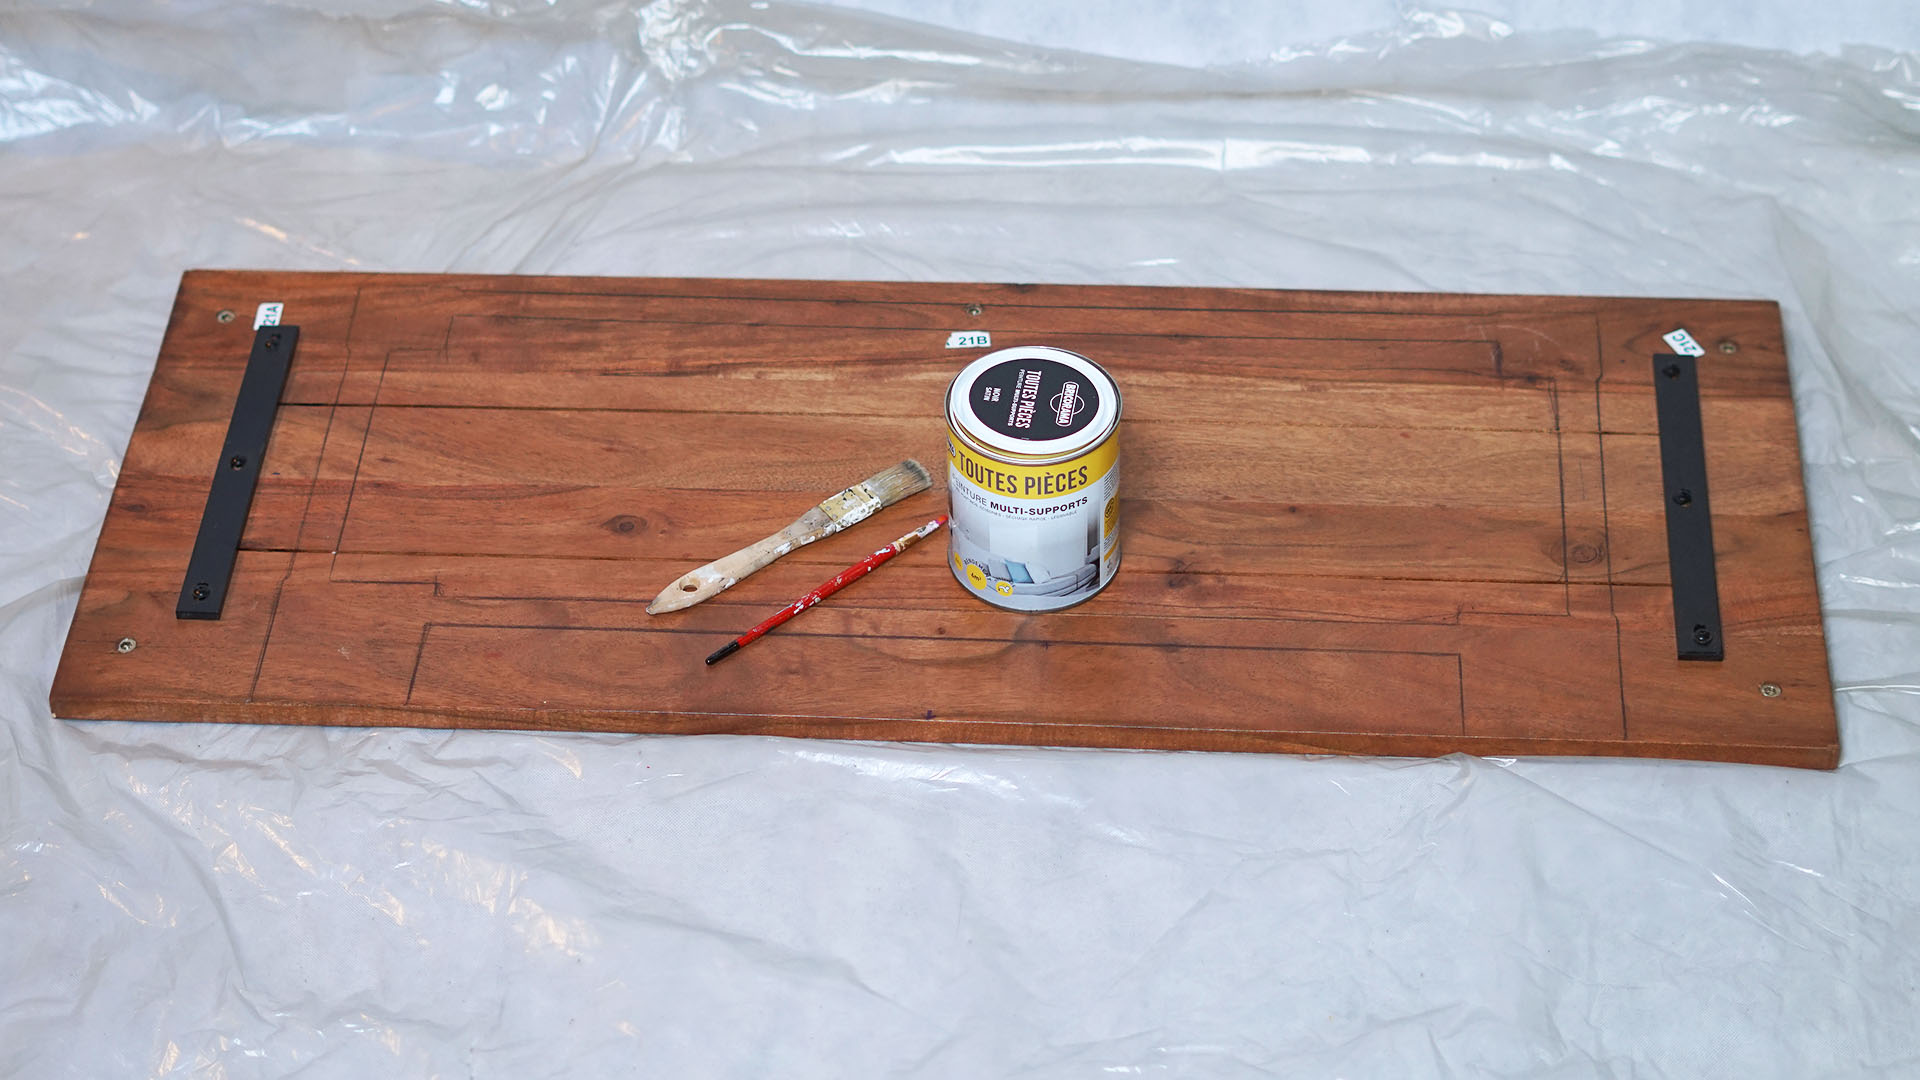
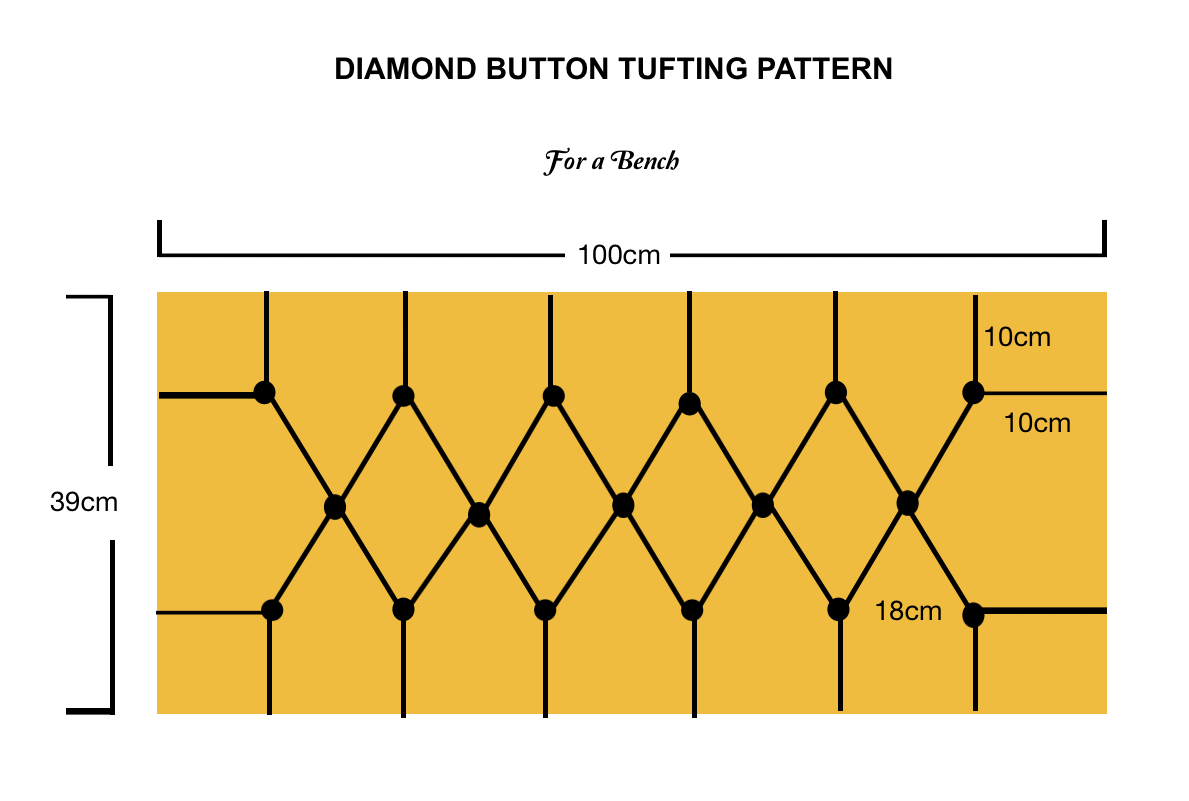
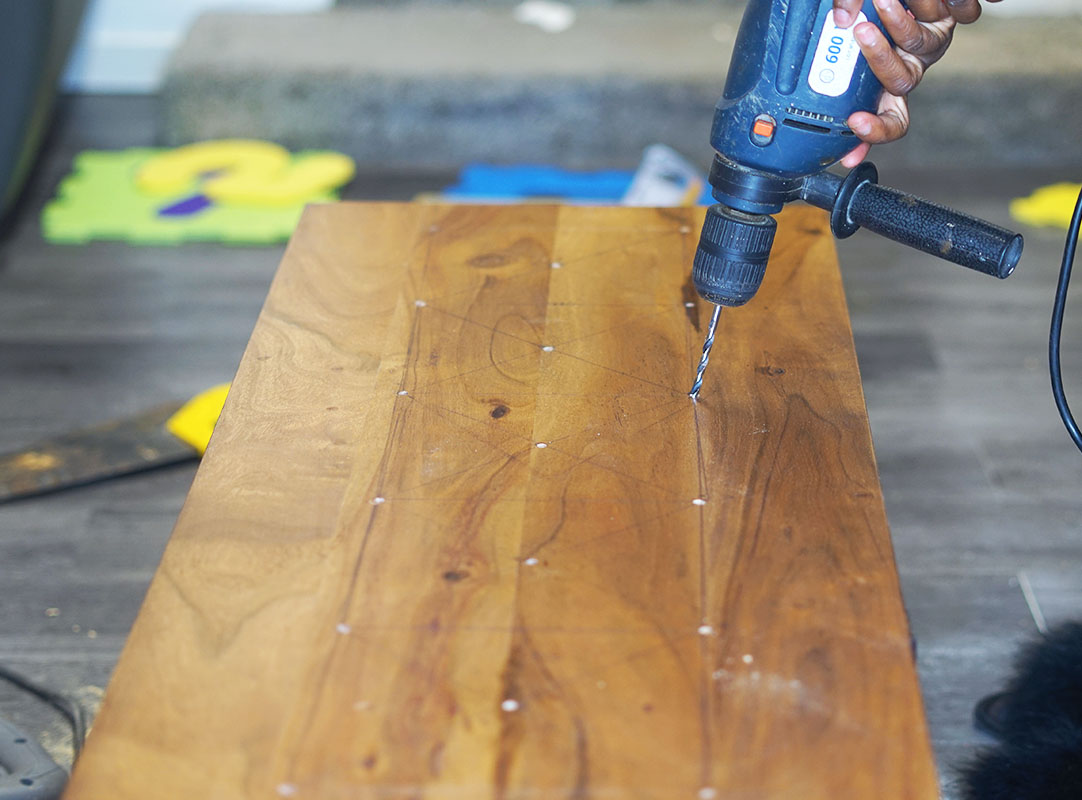
STEP 3: MEASURE A TUFTING DIAMOND HOLE ON THE PLYWOOD
Now turn the rectangular board base around and measure out the diamond buttonholes, on this particular bench I made 6 buttonholes on each rectangular sides and 5 buttonholes in the middle leaving 18cm space from each diamond tufted holes.
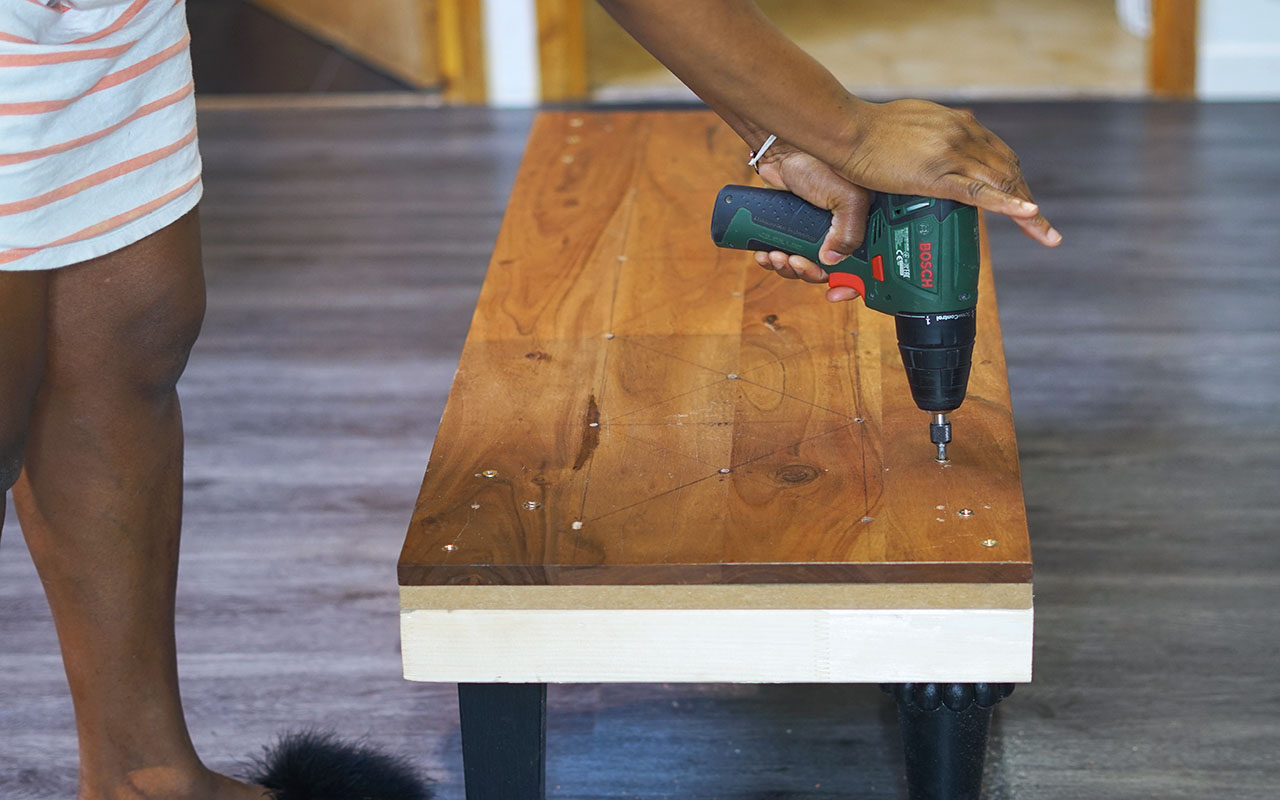
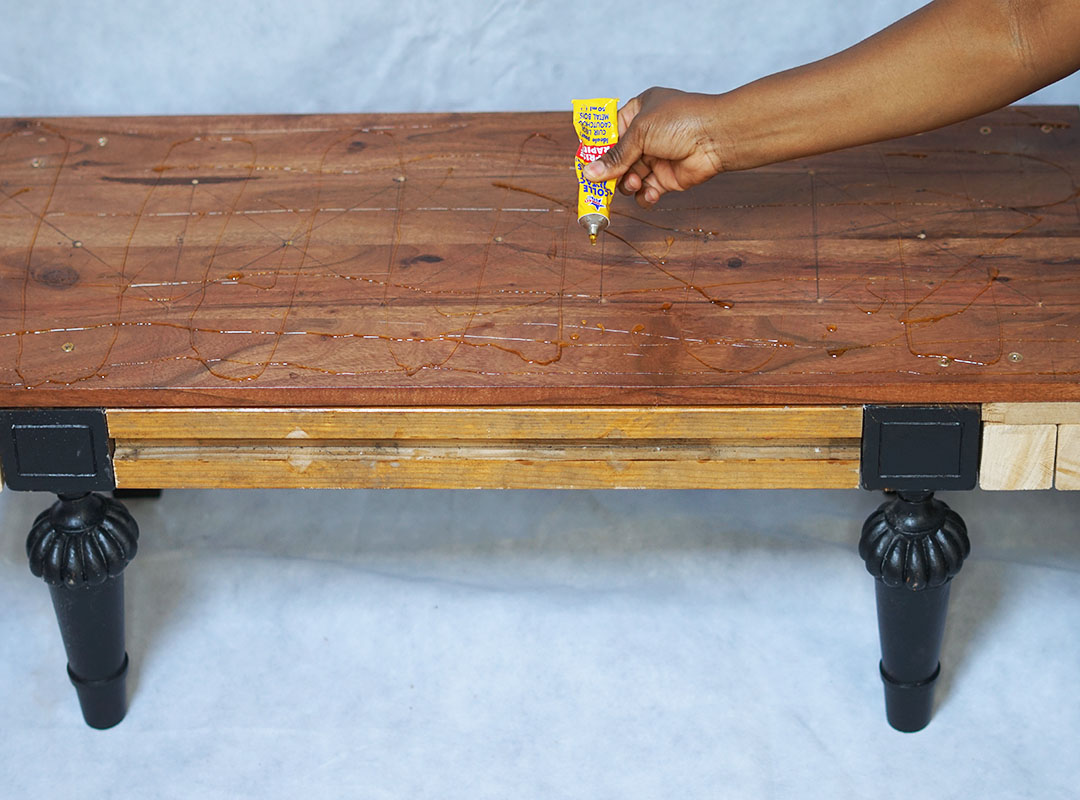
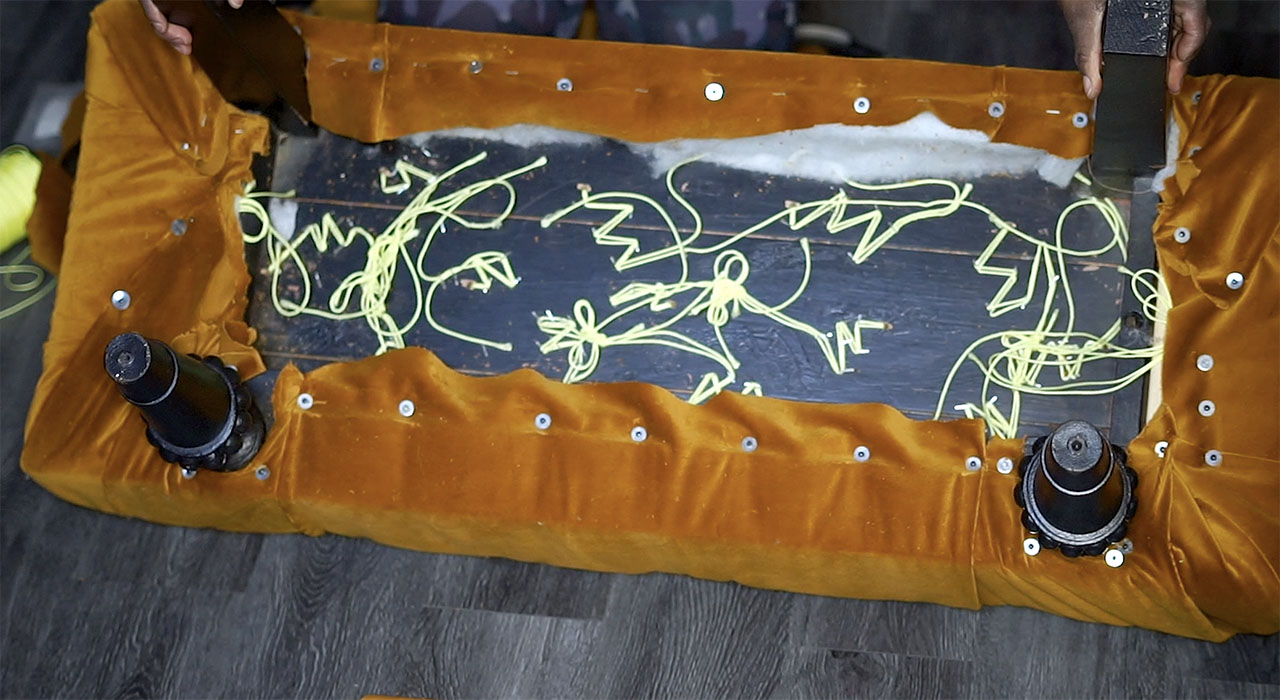
STEP 4: NAILING AND DRILLING PLYWOOD
Place the Plywood board base on top of the bench and nail them together, then take a drilling machine and make some holes on the board. Apply some light brown carpentry adhesive to it and let it dry for about 20 minutes.
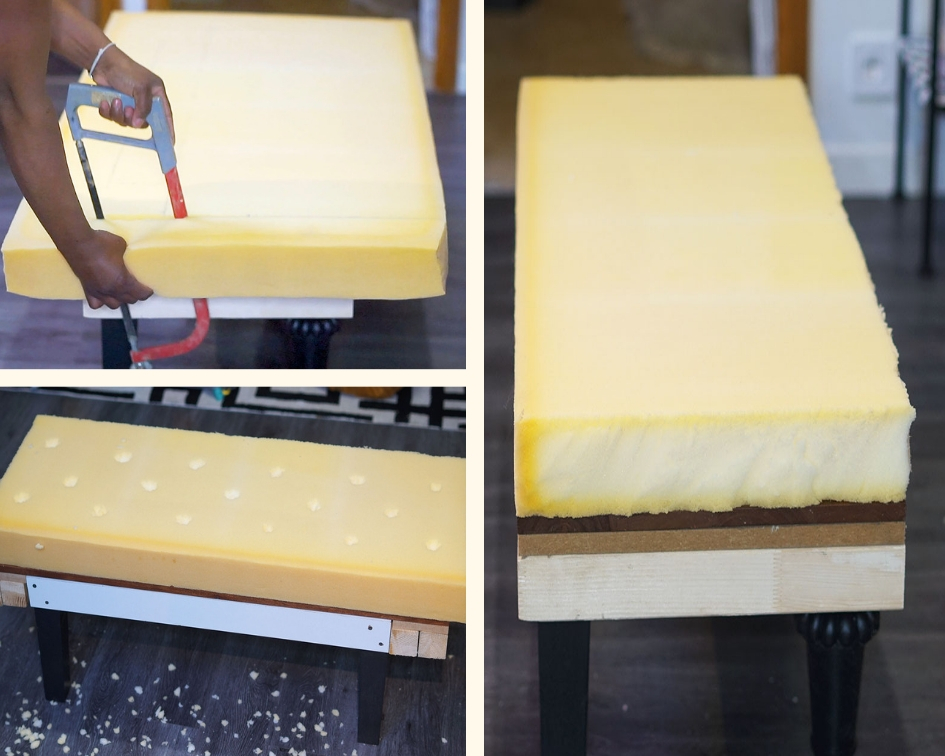
STEP 5: CUT A HOLE IN THE FOAM
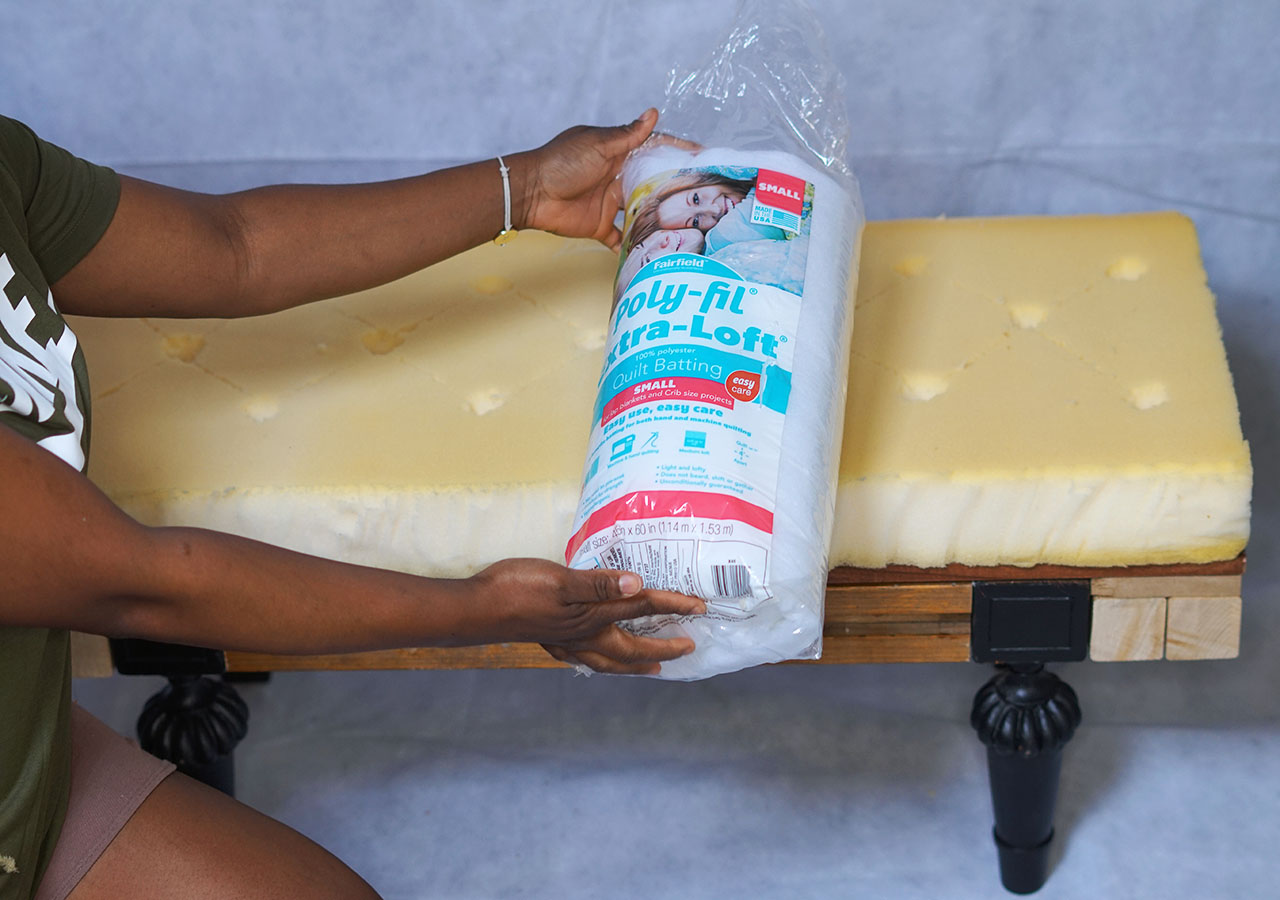
Cut the foam to fit the size of the bench you built. Use an Upholstery Needle to find the hole you drilled in the plywood and pierce it through to the top of the foam, then use a pen to dig a hole through the foam and use scissors or your hand to cut out a circle on the foam, this will serve as a marking point for the buttons.
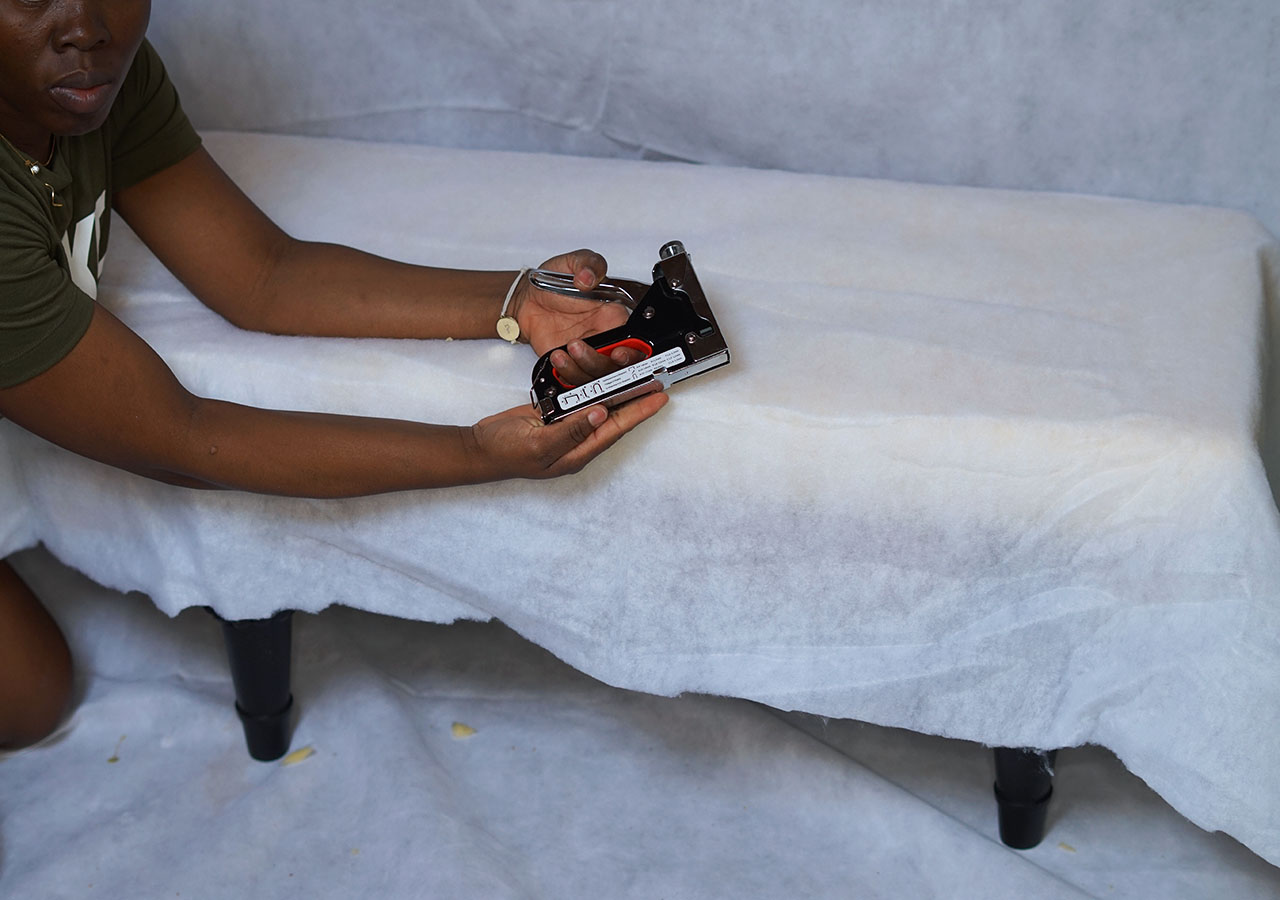
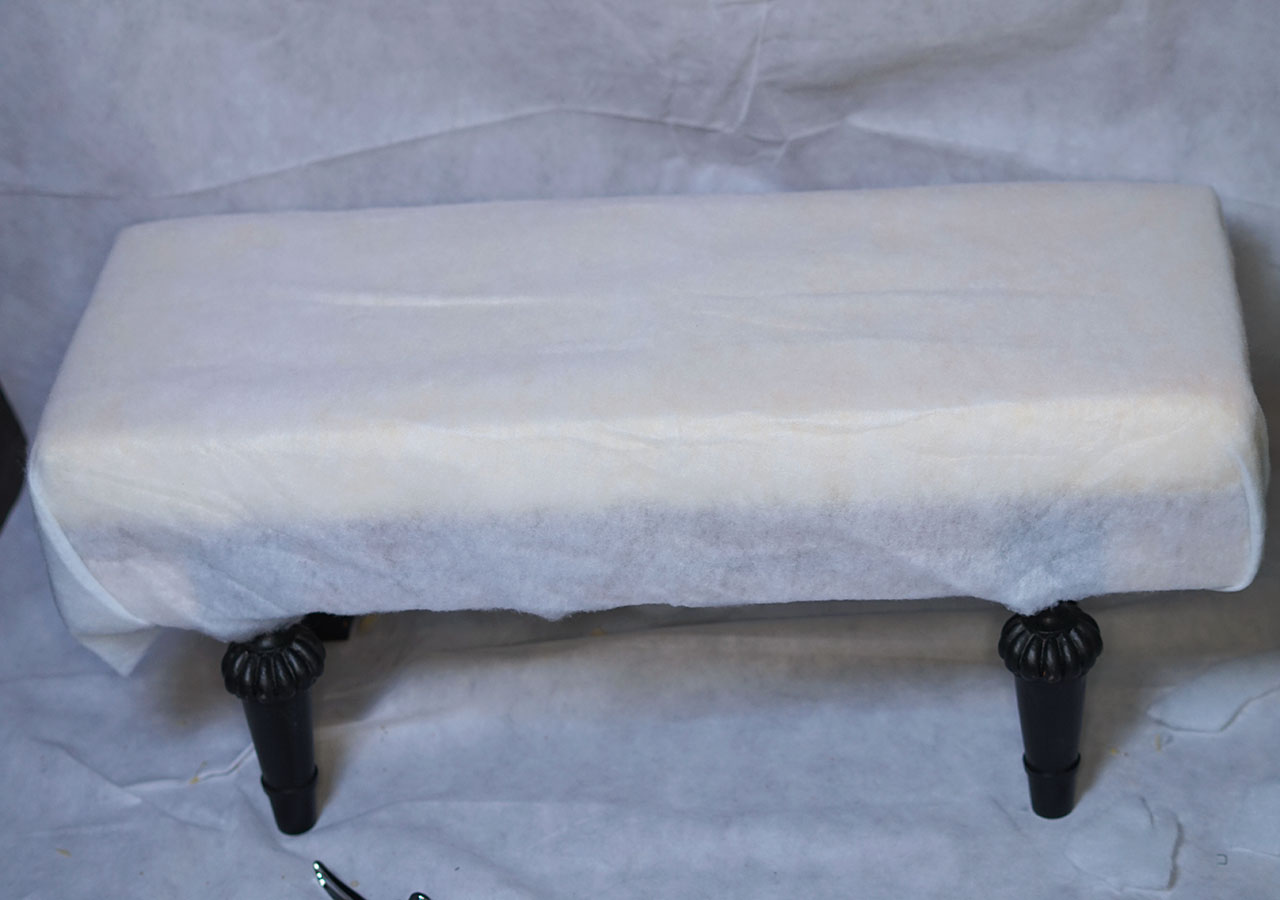
STEP 6: APPLY BATTING FABRIC
Cover the foam with a batting fabric and staple it around the foam, the batting fabric will serve as a middle layer between the foam and the velvet fabric.
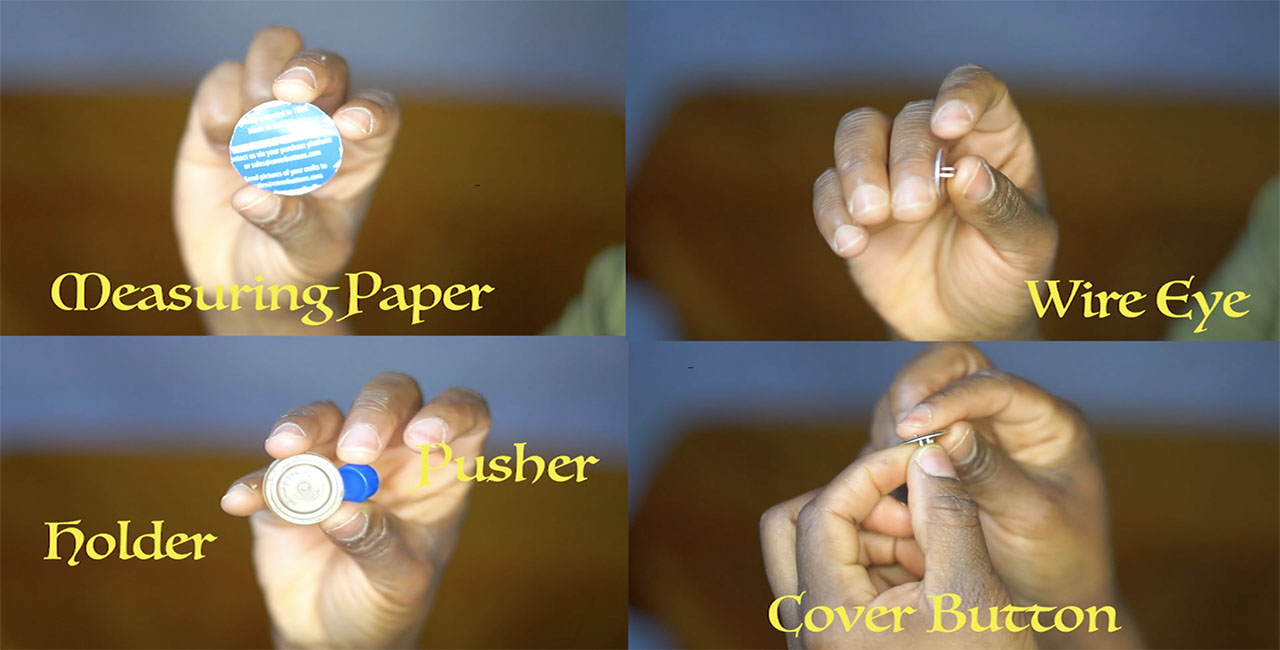
STEP 7: UPHOLSTERY BUTTON
Build an upholstery button using this Cover Button Kit to create it. The kit comes with a measurement paper, a wire eye, pusher, holder and a cover button, Watch the video above to show you how to make an upholstery button.
STEP 8: LAYOUT THE VELVET FABRIC
Get a needle and thread ready. Cover the bench with a piece of quality velvet fabric and pierce the upholstery needle beneath the bench straight through into the foam to the velvet material and insert the upholstered buttons in the needle and drag it down through again. Drag the thread to tighten it to the fabric to create that diamond form and fasten it with a stapler gun in a zigzag form to secure the thread.

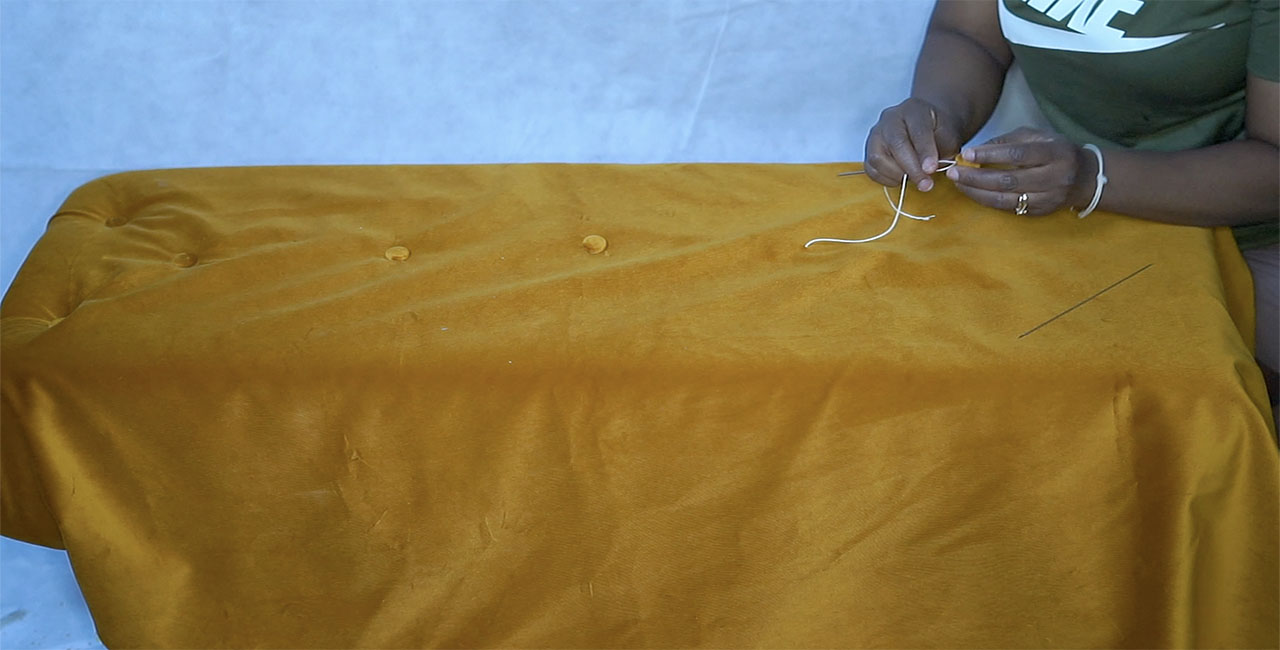
Warp the velvet fabric around the bench and fasten it with a nail and 3mm wide Washer using a hammer. You might need an extra hand from a friend to help you drag the fabric while you nail it on the bench.
STEP 9: COVER UNDERNEATH THE BENCH
Cover underneath the bench with an underlying fabric using fabric glue to seal it up, add pressure to it and leave it to dry.
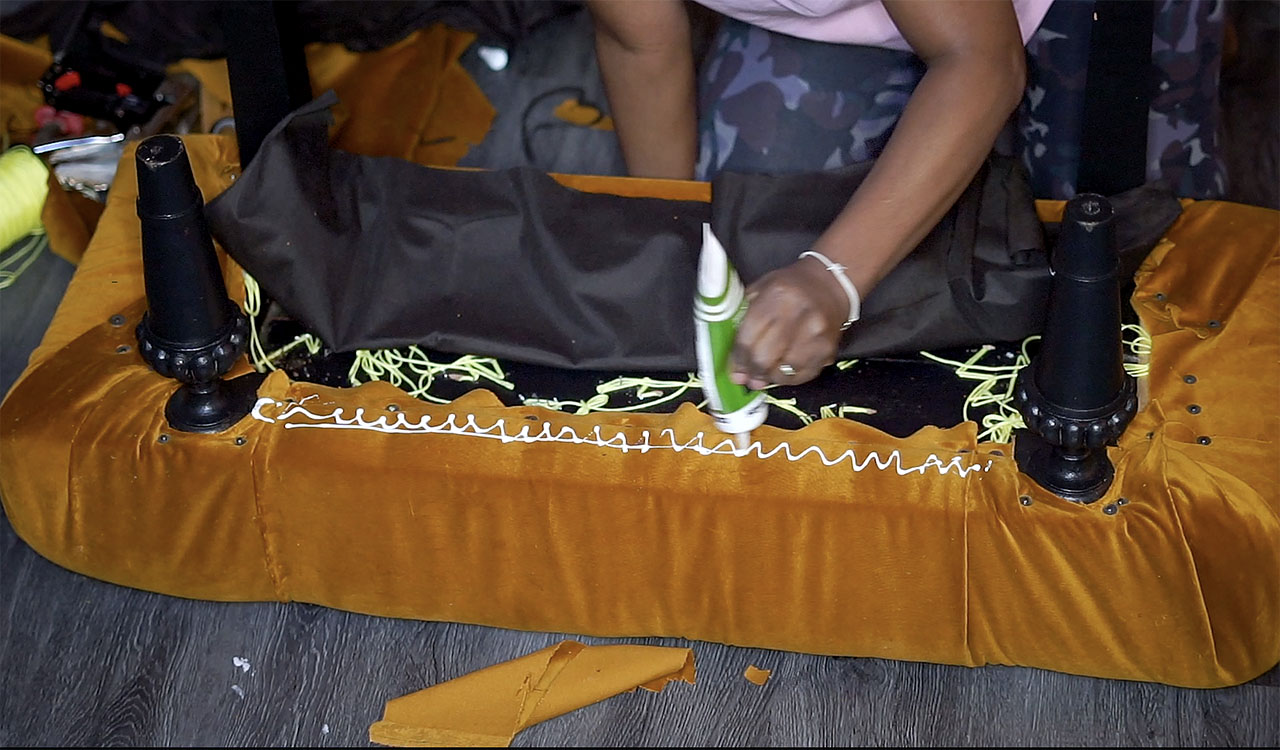

The last and not the least, add your pushpins in the edge of of the bench to give it some beauty.
After making this tufted bench I’m totally challenged to doing more tufting projects from now on.
You can also purchase this Footstool bench in our Online Shop and we can make you a customised footstool and colour of your choice 😉
We have other home decorations that might interest you, please check our online shop.
Want to know how long it took to make it? Feel free to ask me any question to help you build yours.

One thought on “Tufting Hack: How To Make A Solid Buttoned Tufted Bench That Can Last Long”